Creating Your First JPA Entity and Repository in Spring Boot
This post links to: Building a Spring Boot CRUD App With Postgres from Scratch: The Complete Guide.
This guide follows on from Setting Up Spring Boot and PostgreSQL. Detailed below is how to create a database entity and repository using JPA to interact with a Postgres database using Java.
A Guide to JPA
JPA stands for Java Persistence API. It is a Java specification to simplify interacting with relational databases. JPA defines how you can map Java objects (classes) to relational database tables. So instead of using SQL to interact with the database, you use Java objects.
Why Use JPA?
- You write Java code, not SQL queries (some can get really complicated)
- It abstracts away boilerplate database access code
- It handles CRUD, relationships, transactions and many more database features
- You can switch databases (e.g. from PostgreSQL to MySQL) without rewriting all your queries
JPA vs Hibernate
- JPA is the specification (the rules).
- Hibernate is the implementation (the tool that does the work).
In Java terms, think of JPA as the interface and Hibernate as the implementation.
You use JPA annotations and interfaces and under the hood Spring Boot configures Hibernate to make it work.
Spring Boot Starter Data JPA
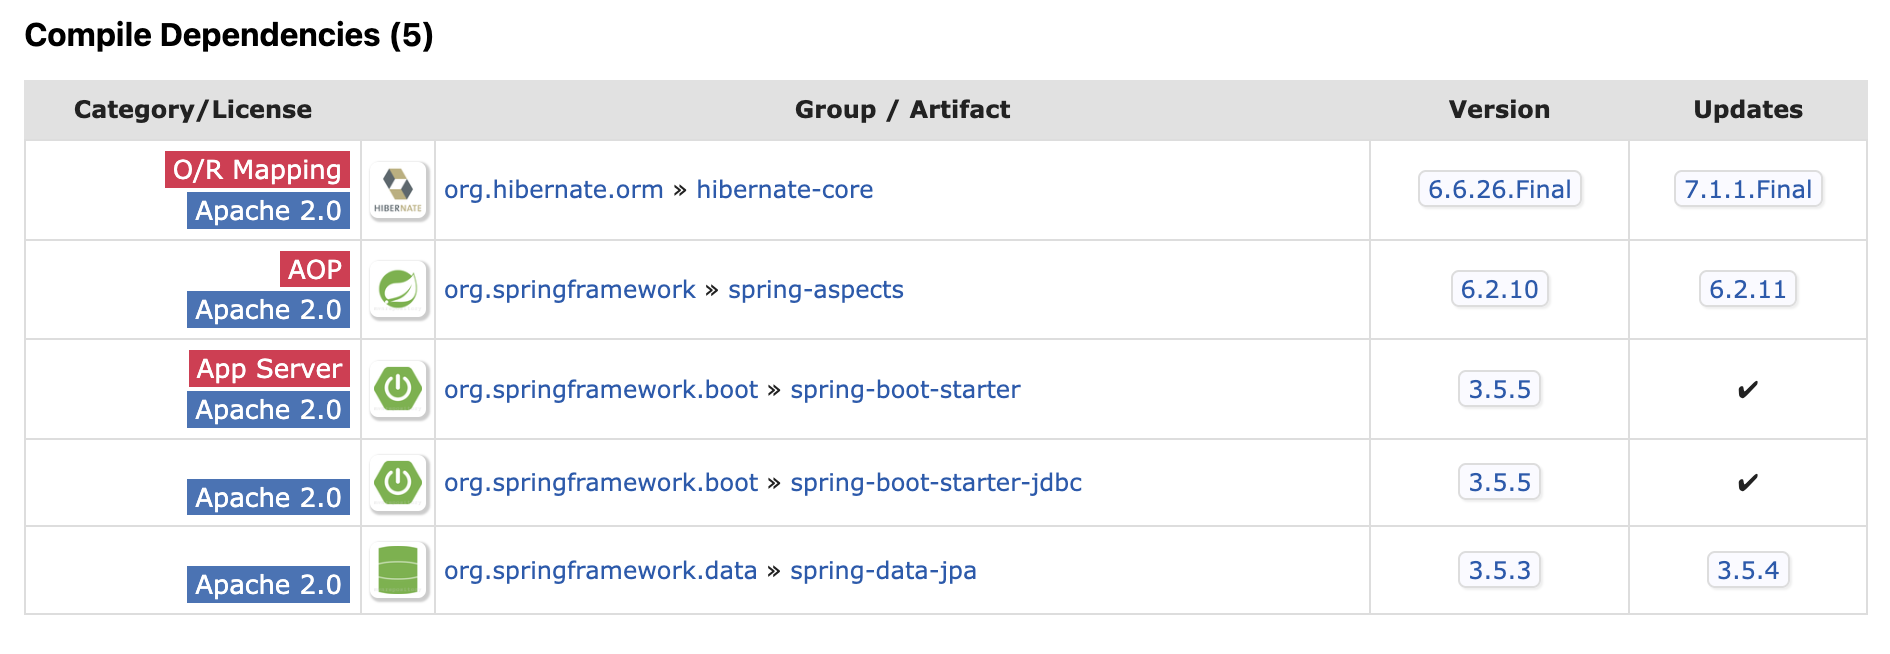
The spring-boot-starter-data-jpa library is what Spring Boot uses to implement JPA and Hibernate.
A Spring Boot starter is a pre-configured bundle of dependencies designed to achieve a specific goal within a Spring application. In our case, connecting our Spring application to a relational database (PostgreSQL).
Here are the dependencies that the spring-boot-starter-data-jpa library brings in:

Creating a JPA Entity
We can create a JPA entity called User simply like so:
// User.java
@Entity
@Table(name = "users")
public class User {

    @Id
    @GeneratedValue
    @Column(name = "id")
    private Long id;

    @Column(name = "name")
    private String name;

    @Column(name = "email")
    private String email;

    public User(final Long id, final String name, final String email) {

        this.id = id;
        this.name = name;
        this.email = email;
    }

    public User() {}

    public Long getId() {

        return id;
    }

    public String getName() {

        return name;
    }

    public void setName(final String name) {

        this.name = name;
    }

    public String getEmail() {

        return email;
    }

    public void setEmail(final String email) {

        this.email = email;
    }
}
Annotations
@Entity- Marks a Java class as a JPA entity. This ensures it gets recognised as a database entity by JPA/Hibernate.@Id- Marks the field of the entity as the primary key.@GeneratedValue- Used alongside@Idto auto-generate the primary key for the JPA entity.@Table(Optional) - Used to specify the name of the table for this JPA entity. By default, if this isn't specified, the table name will be the same as the class name. Adding this annotation makes your entity more robust by ensuring that changing the class name doesn't automatically change your table name.@Column(Optional) - Specifies how a field maps to a column like whether it's nullable or the column name. By default, if this isn't specified, the column name will be the same as the field name. Again, adding this annotation makes your entity fields (columns) more robust by ensuring that changing the fields of the class doesn't automatically change your table columns unless specified.
Creating a JPA Repository
Now we have a JPA entity defined, we need to create a JPA repository to interact with the database for our entity.
Here's how to create a JPA repository for our entity:
// UserRepository.java
@Repository
public interface UserRepository extends JpaRepository<User, Long> {
}
@Repository- this helps Spring detect and register it automatically via component scanning.- Extending the JPA repository then tells Spring to autoconfigure this as a JPA repository to interact with the database.
extends JpaRepository<T, ID>- This part is the extended repository provided by JPA,Tis the entity type (User.java) andIDis the expectedIDtype (Long).
So Spring Boot autoconfigures:
- A
DataSource(connection to your database) - Hibernate (JPA provider)
- The transaction management
- The actual implementation of
UserRepository
Creating this repository gives us access to many methods to interact with the database, including:
findAll(): Get all records from the tablefindById(Long id): Get one record by its primary keysave(User user): Insert or update a user recorddeleteById(Long id): Delete a record by its primary keyexistsById(Long id): Check if a record existscount(): Count all stored records
Testing Our JPA Setup
We can now test whether our JPA/Hibernate setup will work creating a @DataJpaTest test.
@DataJpaTest will bring the JPA and Hibernate context up in your Spring Boot application and also bring in a H2 in memory database to use as a test database.
To use H2 for tests, you'll need to add the following dependency to the build.gradle file:
// build.gradle
dependencies {
//  other deps...
    testRuntimeOnly 'com.h2database:h2'
}
Then define the following test below:
// UserRepositoryTest.java
@DataJpaTest
class UserRepositoryTest {

    @Autowired private UserRepository userRepository;

    @Test
    void userRepositoryTest() {

        final var user = new User(null, "fbd", "fbd@example.com");
        final var savedUser = userRepository.save(user);

        final var foundUserList = userRepository.findAll();

        assertThat(foundUserList).hasSize(1);
        assertThat(foundUserList.get(0)).isEqualTo(savedUser);
    }
}
You can run the test in the command line using Gradle:
./gradlew test --tests 'UserRepositoryTest'
What's Next?
So to recap we:
- Created a user JPA entity
- Created a user JPA repository
- Added a test to make sure our connection to the database is working