How to Set Up a Spring Boot Project with PostgreSQL: A Step-by-Step Guide
This post links to: Building a Spring Boot CRUD App With Postgres from Scratch: The Complete Guide.
This guide will show you how to set up a Spring Boot project from scratch and then set up and connect to a PostgreSQL database on your local machine.
Follow these Java/Spring Boot prerequisites before starting.
1. Creating the project with Spring Initializr
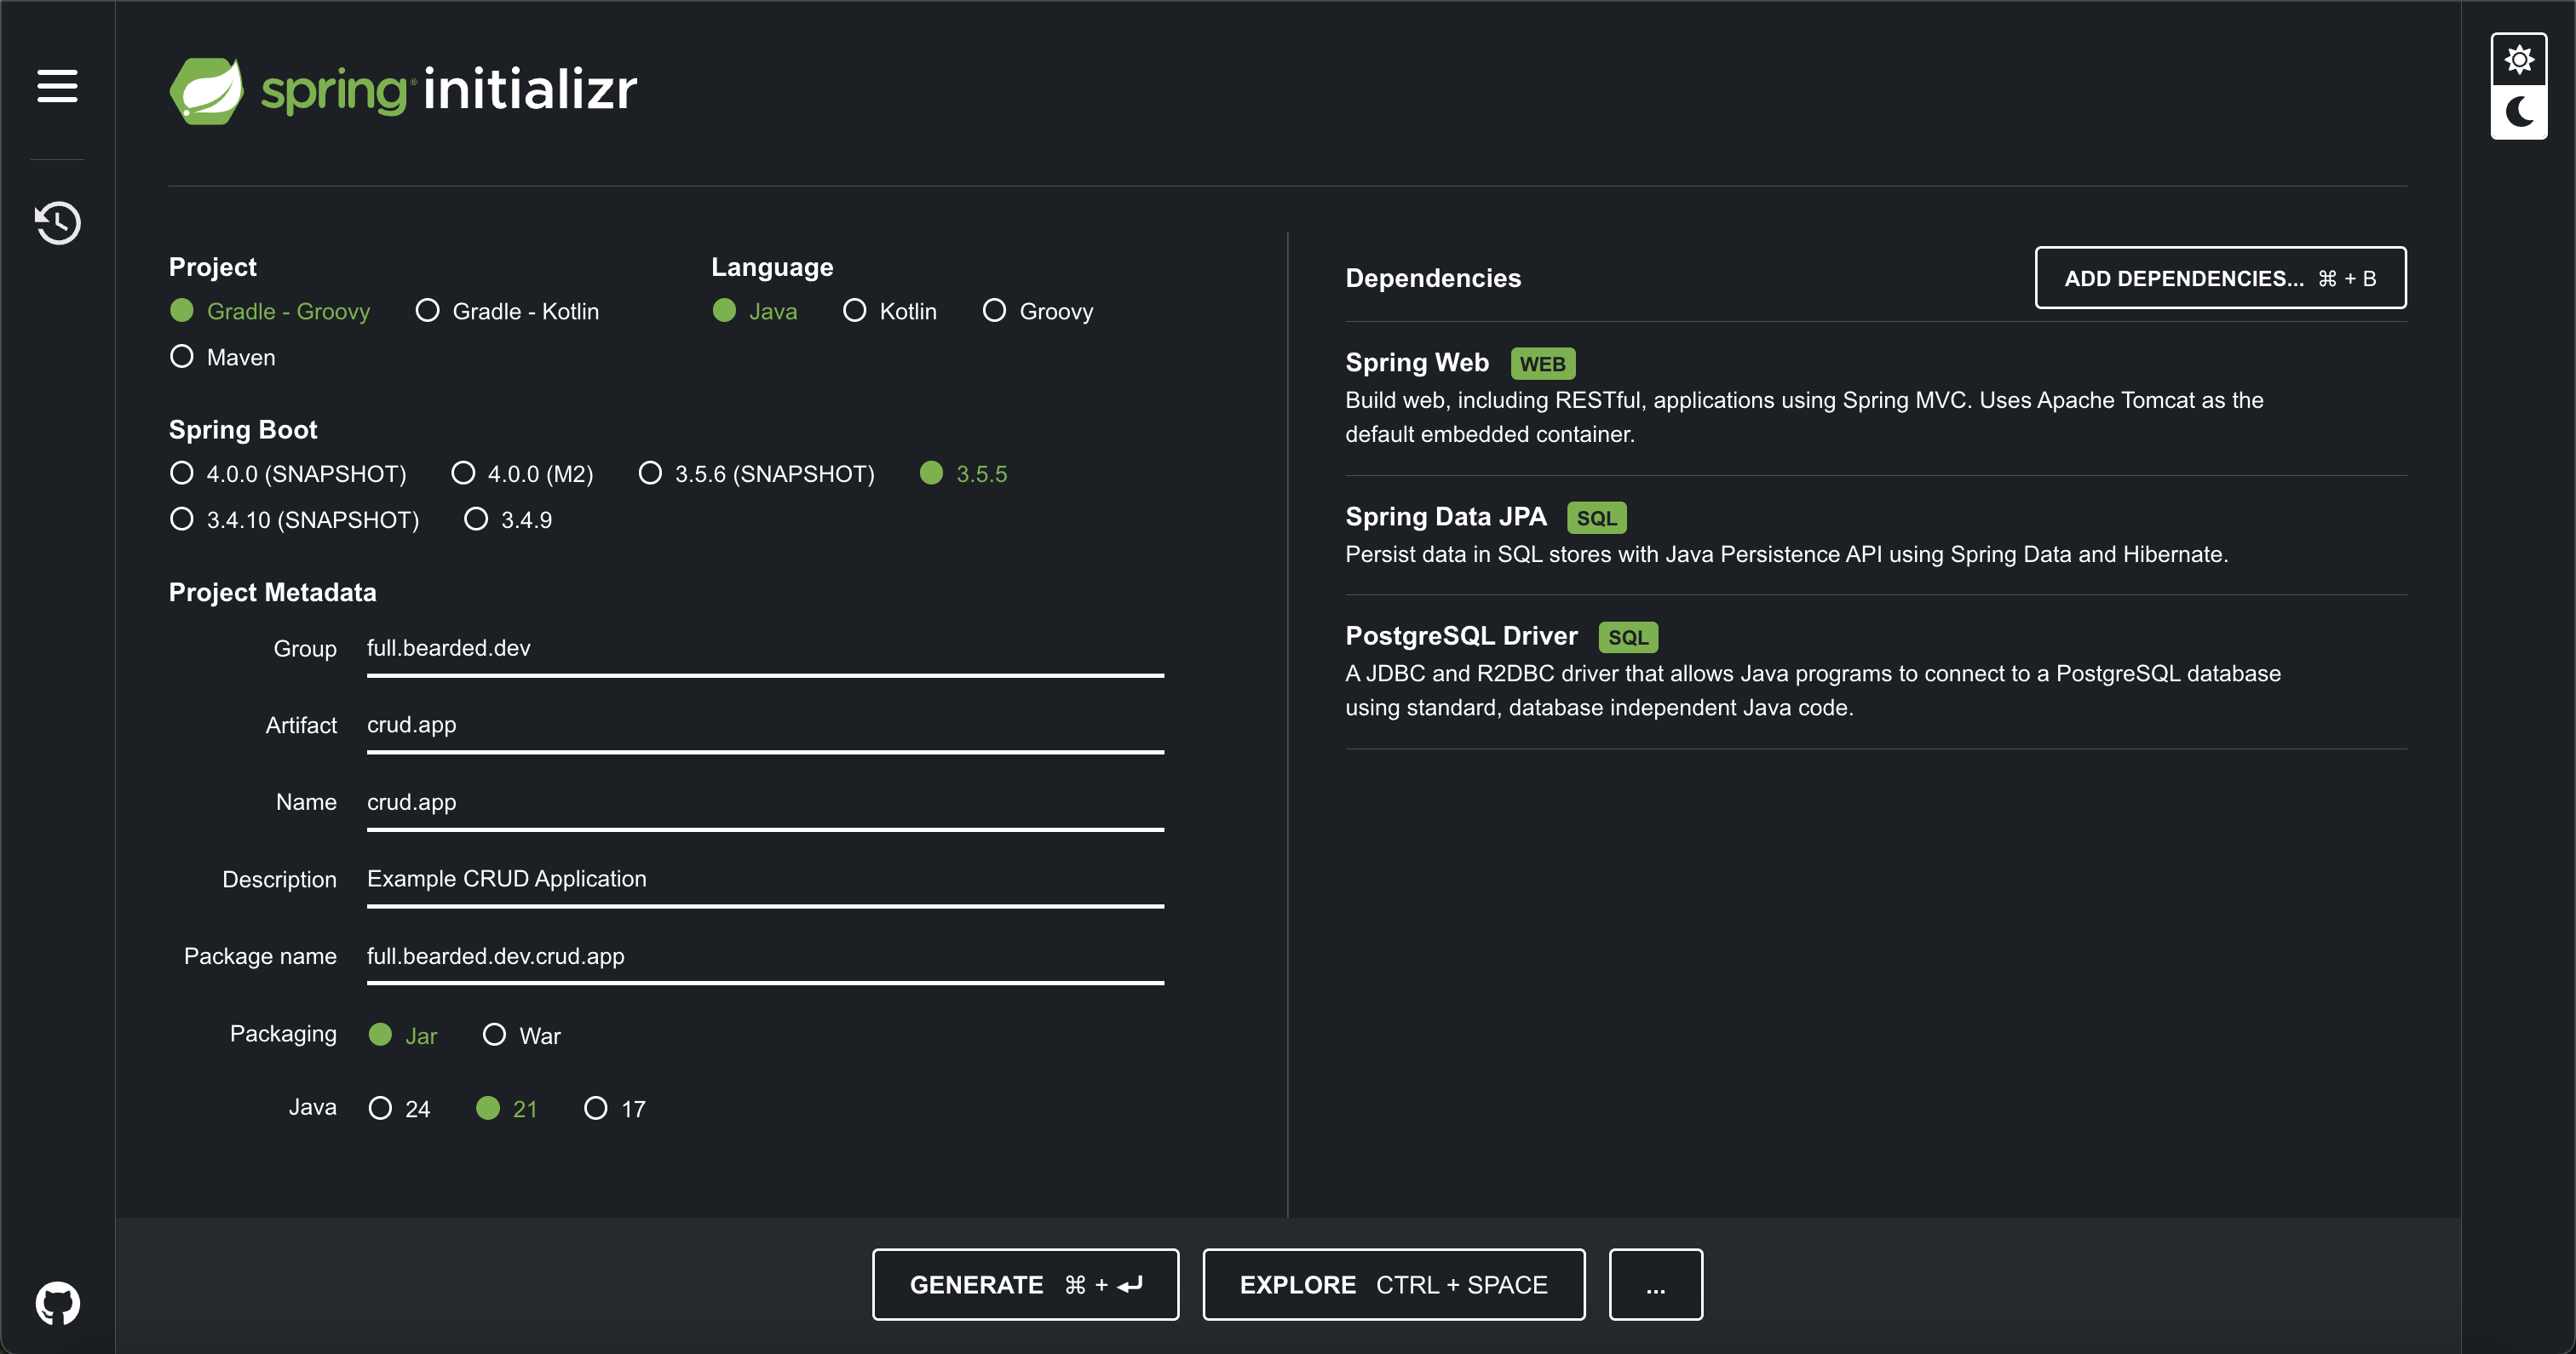
Firstly, we will need to navigate to Spring Initializr.
Spring Initializr is a tool where we can specify project requirements like what version of Java and Spring Boot we want to use, any metadata about our project and any Spring dependencies we want to bring into this project.
Once configured, the "GENERATE" button will output a basic Spring Boot project scaffold into a ZIP file, which we can use to start creating our CRUD application.
For this project, we will need the following configuration set:
After clicking "GENERATE", a ZIP file should be downloaded.
You can now open the ZIP in whatever integrated development environment (IDE) or editor of your choice. I'll be using IntelliJ.
2. Project Structure
Once the ZIP file has been opened, you should see a similar structure to below:
.
├── HELP.md
├── README.md
├── build.gradle
├── gradle
│   └── wrapper
│       ├── gradle-wrapper.jar
│       └── gradle-wrapper.properties
├── gradlew
├── gradlew.bat
├── settings.gradle
└── src
    ├── main
    │   ├── java/full/bearded/dev/crud/app
    │   │                               └── Application.java
    │   └── resources
    │       ├── application.properties
    │       ├── static
    │       └── templates
    └── test
        └── java/full/bearded/dev/crud/app
                                        └── ApplicationTests.java
Gradle
build.gradle: details the build configuration, tasks, project libraries and pluginsgradle-wrapper.jar&gradle-wrapper.properties: these files provide a gradle wrapper which can used to run gradle without installing it. A wrapper is used to ensure whoever uses this project can use the same version of gradle rather than whatever version they have installed locally.gradlew (Linux/Unix)&gradlew.bat (Windows): scripts to run the gradle wrapper. The./gradlewcommand will run thegradlewscript andgradlew.batwill run thegradlew.batscript.settings.gradle: gradle specific settings such as the root project name
Spring Boot & Java
Application.java
This is where our application will run from:
// Application.java
@SpringBootApplication
public class Application {

	public static void main(String[] args) {
		SpringApplication.run(Application.class, args);
	}
}
Resources
- We can ignore the static and templates folders as this is more to do with HTML and templating engines like Thymeleaf
application.properties: this is where we can define our application-specific properties for our Spring Boot application. We will be using this to connect to Postgres.
ApplicationTests.java
This is an integration test using the @SpringBootTest annotation. This will bring up the Spring ApplicationContext so we can test our application loads and test any dependencies between components. This could include test cases like: can we connect to a database, or does our app return the correct info when we query it via an API.
@SpringBootTest
class ApplicationTests {

	@Test
	void contextLoads() {
	}

}
3. Install & Run PostgreSQL
We will also need a PostgreSQL database running locally. We can do this using Docker which you can install following the Java/Spring Boot prerequisites Docker section.
Once you have Docker installed, you can run a PostgreSQL instance using the following command in the terminal:
docker run --name postgres \
  -e POSTGRES_USER=dev \
  -e POSTGRES_PASSWORD=password \
  -e POSTGRES_DB=test_db \
  -p 5432:5432 \
  -d postgres
You can verify Postgres is running using the following command in the terminal:
docker ps
If Postgres is up and running, you should see a similar output:
CONTAINER ID   IMAGE      COMMAND                  CREATED              STATUS              PORTS                                         NAMES
38d318ace277   postgres   "docker-entrypoint.s…"   About a minute ago   Up About a minute   0.0.0.0:5432->5432/tcp, [::]:5432->5432/tcp   postgres
4. Configure Spring to Use PostgreSQL
Now we should have our initialised Spring Boot app and local version of Postgres running in Docker. The next part is to connect our application to our database.
We can do that by configuring the following options in the application.yml file:
# application.yml
spring:
  application:
    name: crud.app
  datasource:
    url: jdbc:postgresql://localhost:5432/test_db
    username: dev
    password: password
  jpa:
    hibernate:
      ddl-auto: update
    show-sql: true
    properties:
      hibernate:
        dialect: org.hibernate.dialect.PostgreSQLDialect
datasource: defines the url to connect to the database in Docker and the username and password used to authenticate.ddl-auto: setting it toupdatetells Spring to auto-create tables from your defined entities. We’ll change this later for production use.show-sql: will show any SQL commands used when using JPA. More info on JPA here.hibernate.dialect: tells hibernate which database engine dialect we expect. In this case it is Postgres as this dialect may differ from other engines like MySQL.
5. Run the App
The last step is to run our application to check that it can connect to our Postgres instance.
To run the application you can do the following in the terminal:
./gradlew bootRun
# or if using Maven:
./mvnw spring-boot:run
You should see an output that resembles this:
Tomcat started on port(s): 8080
Started Application in 2.5 seconds
If so your app is running and connected to Postgres!
What's Next?
So to recap we:
- Created a template Spring Boot application with Spring Initializr
- Reviewed the project structure
- Installed and ran Postgres using Docker
- Configured our application to connect to Postgres
- And ran our application to test it could successfully connect to Postgres
Up Next: Creating Your First JPA Entity and Repository in Spring Boot!